Application & Screening Process
Getting Started: Apply for a Property
- From a company or property website, the applicant will click on Floor Plans or Check Availability to view available rentals.

2. Choose the floorplan or property of choice, and click Check Availability, then Apply.
3. From there you will see the Lease Information including Lease Amount, Term and available date. Click Apply to continue.
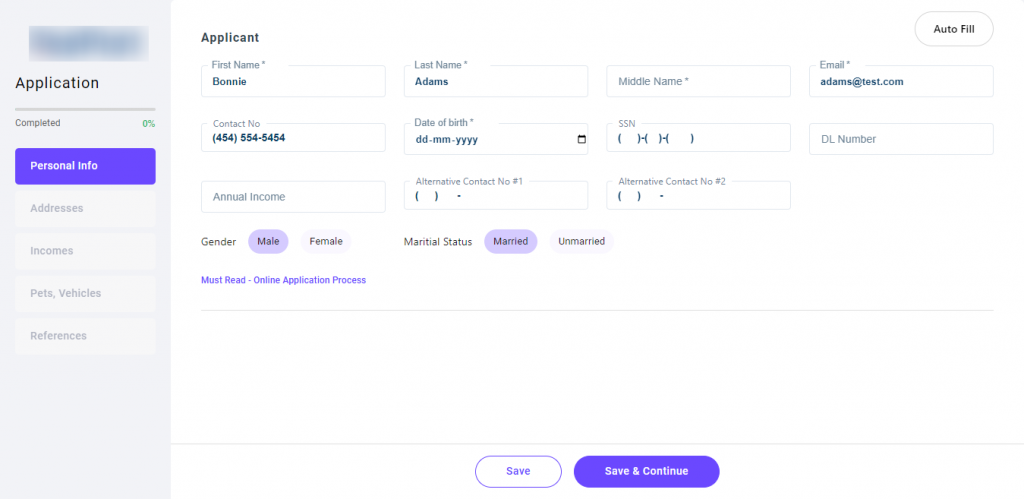
4. Fill out the Application as shown below, then click Submit.
5. The screen below will pop up to confirm, click Here to continue your application.
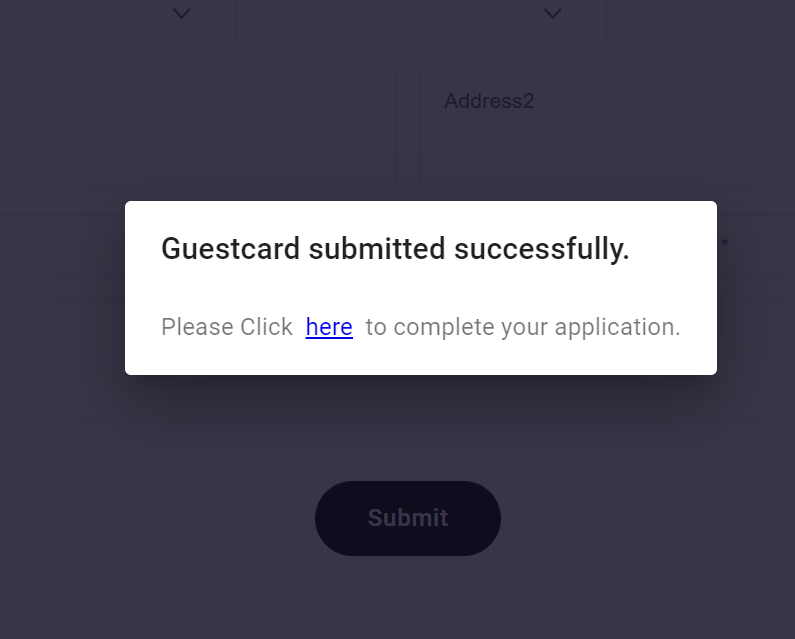
6.Include all applicants who will be residing in the household when filling out the applicant information. Hit “Publish.” A message indicating success will appear.
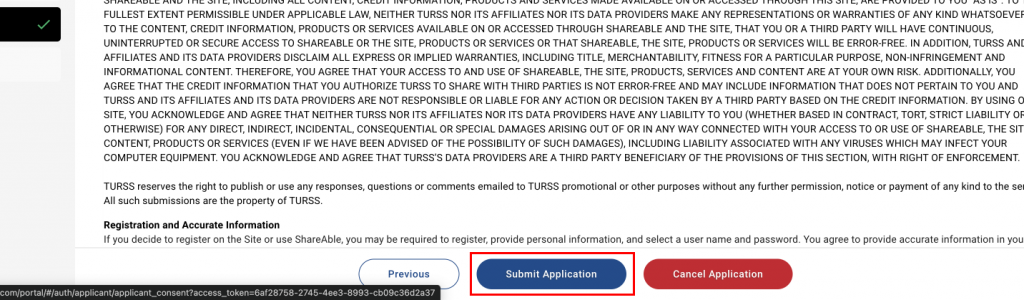
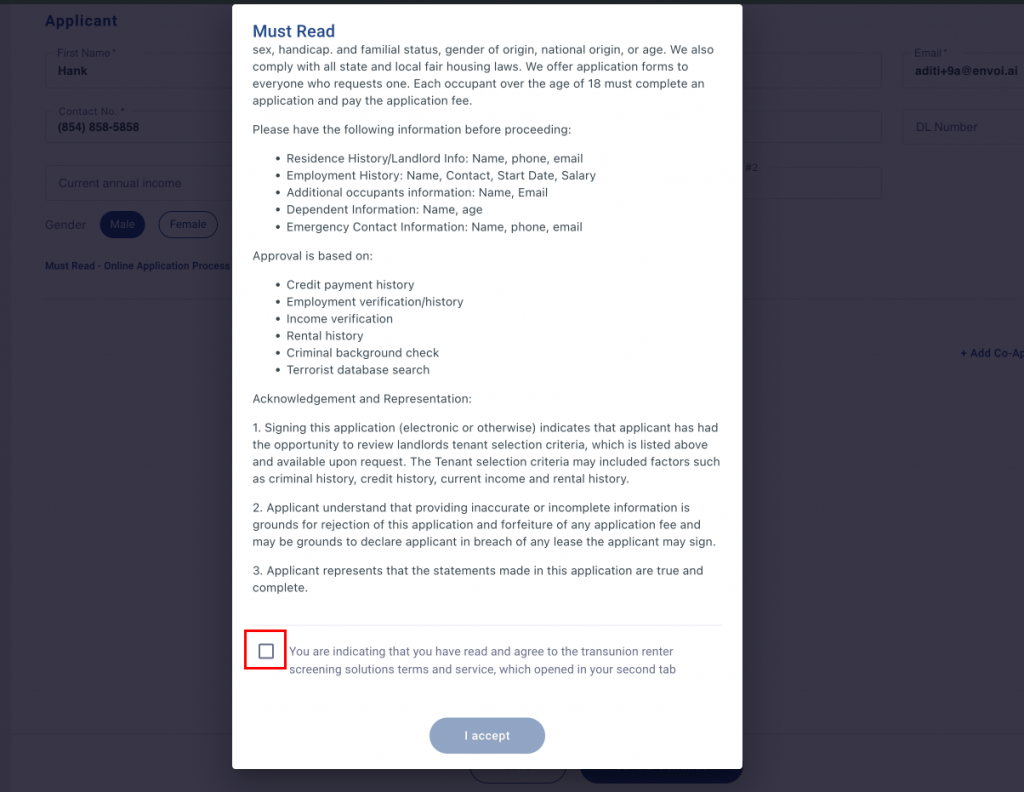
7. To continue the application, follow the directions in the Must Read message that appears below. Check the box after reading, then select I accept to proceed.
Fill out Application
There are a few required fields on the application form that need to be filled out very carefully. The application must be completed in 8 stages. Note: To keep your personal information safe, you can always select Save as draft.
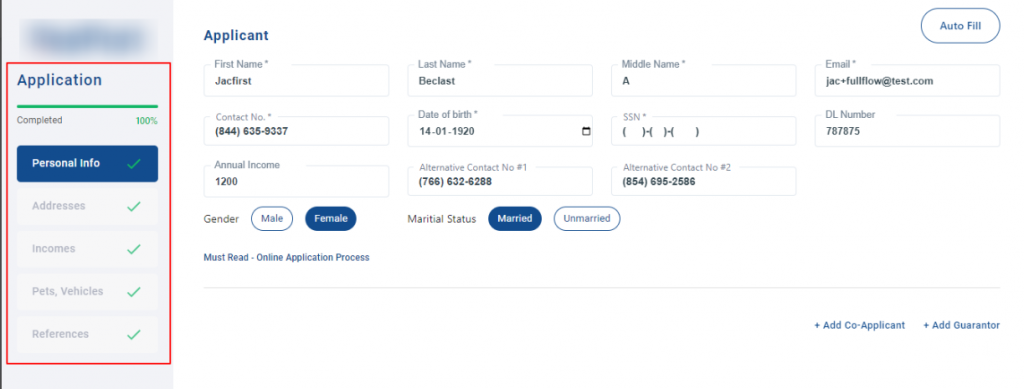
1. Personal Details:
- Add all applicant details, including full name, contact information, date of birth, social security number, etc.
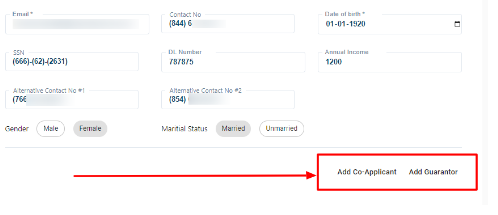
- Add Co-applicant: Add co-applicant for every adult living within the unit.
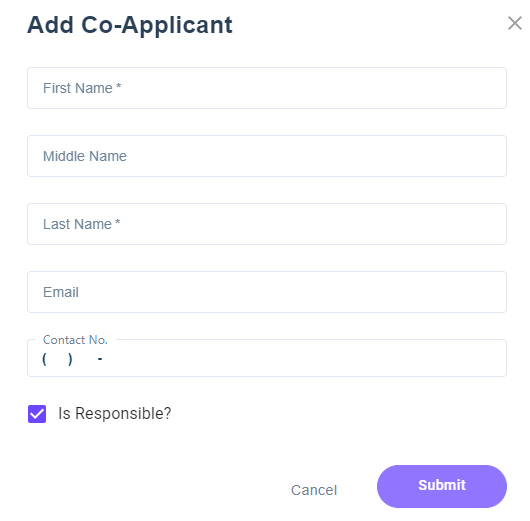
- Click on Add Co-Applicant. Add co-applicant information shown below. Check if the co-applicant is a responsible party. Note: If box is left unchecked then date of birth will be asked to be considered as a minor. Then click Submit. Upon submission the co-applicant will receive an email to complete their portion of the application.
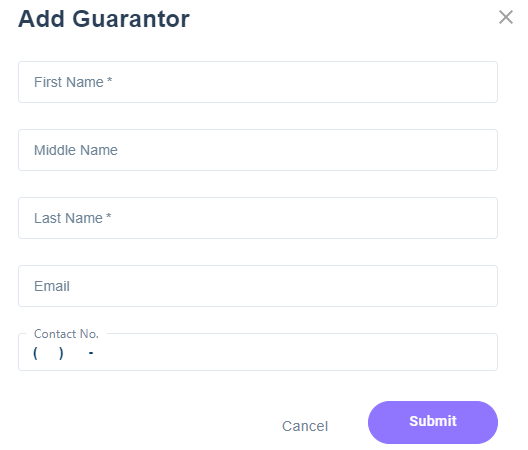
- Add Guarantor: as needed.
- Click on Add Guarantor, add information as seen below, then click Submit. Upon submission, an email will be sent to the Guarantor to complete their portion of the application.
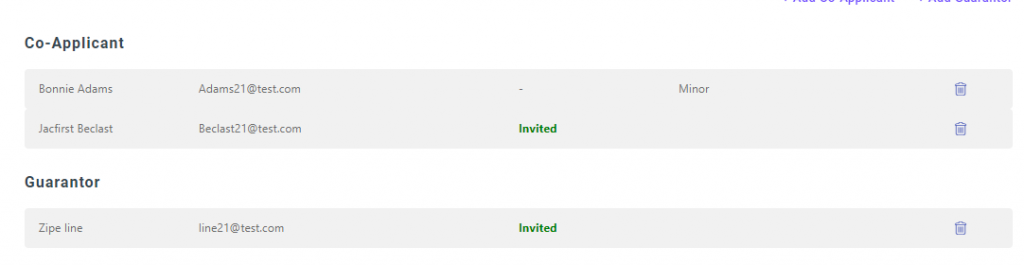
- Once the co-applicant and guarantor are added, they will be seen in the application listing as shown below.
2. Address: Fill in current and previous address details. Must include full address, lease expiration date, landlord information and address type.

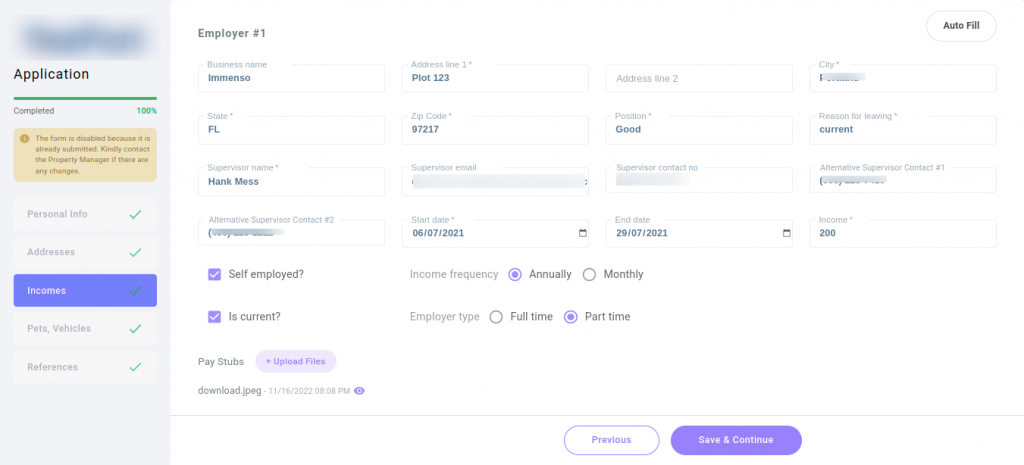
3. Employers Details
- Fill in all current employer details including business name, address, position, supervisor information, etc.
- Then indicate the income frequency, employer type, and self employed and current status.
- Upload income files such as paystubs, etc.
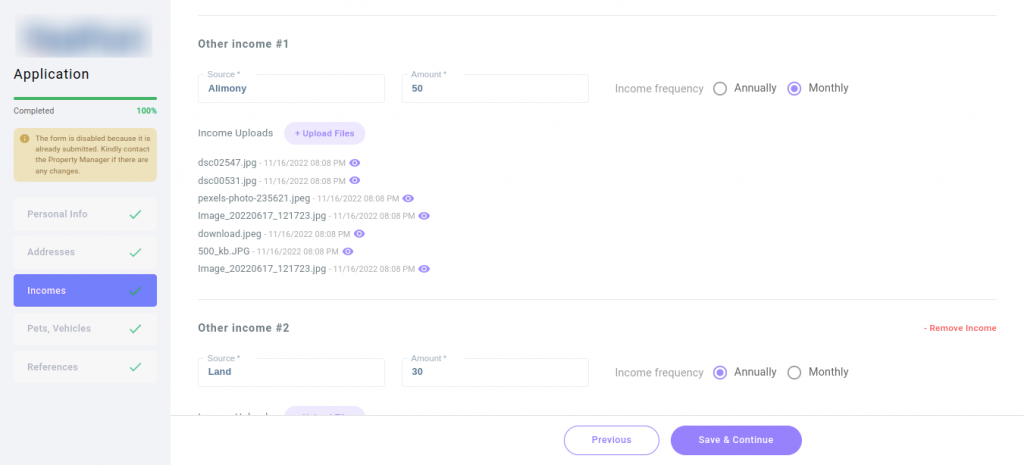
4. Other Income: This is an optional field, you can add any other sources of income that you want considered in the rental process. You can add more than one, as needed.
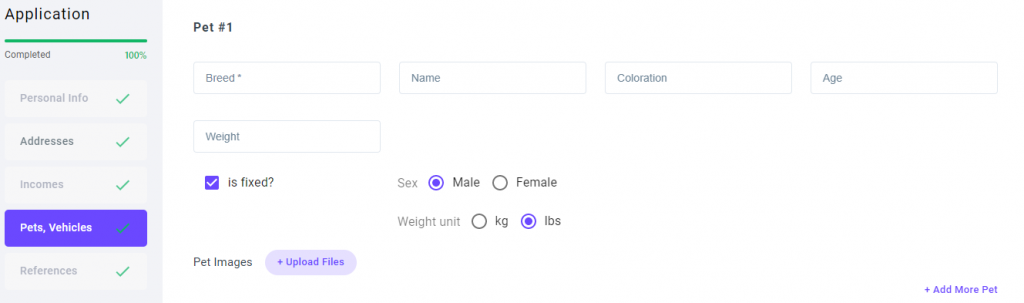
5. Pets: This is an optional field, all pets that will be housed within the unit need to be added to this section.
- For each pet, add breed, name, coloration, age, weight, sex. Also indicate if the pet is fixed and/or declawed.
- Also add an image of your pet.
- To add more pets use the Add More Pet button.
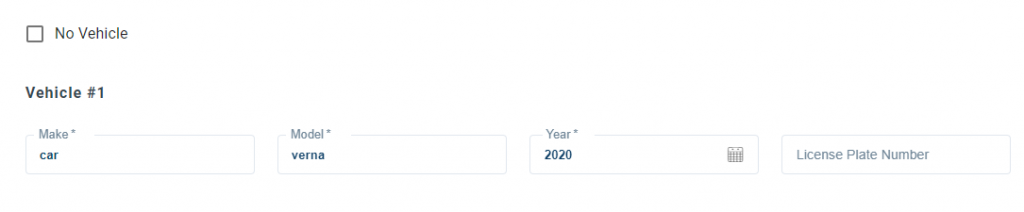
6. Vehicle: Add all vehicles that will be parked on the property by applicants. If there is no vehicles check the No Vehicles box.
7. References: Add references information including name, contact number, email and relationship to applicant.

Consent, Signature & Submission of Application
- Check the box shown below to consent to sharing your data with the landlord and employer verification. This is required to continue.

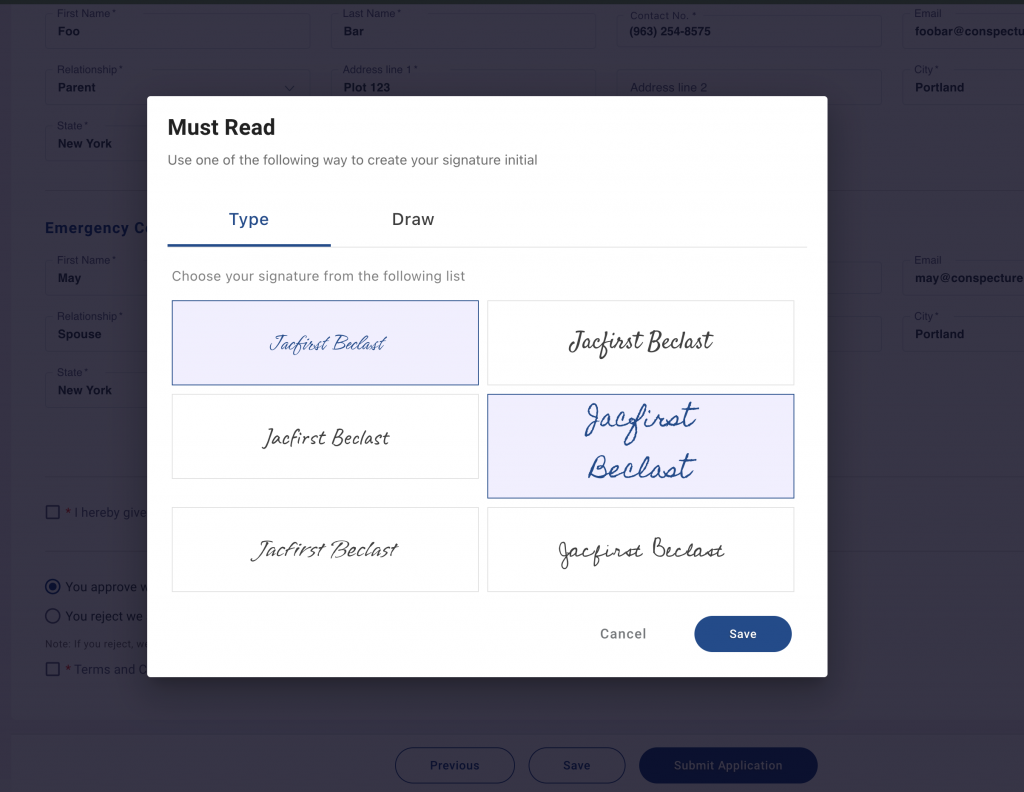
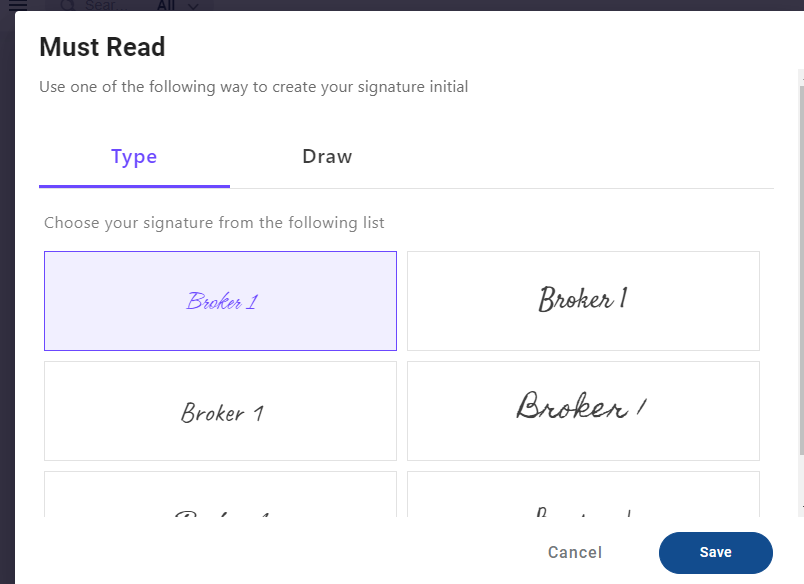
- When the box is checked, a pop up will open to create a signature by selecting or drawing a signature. Click Save to sign.
- You must click to approve that your credit data will be sent to the landlord. If you choose to reject it, the form will not process.
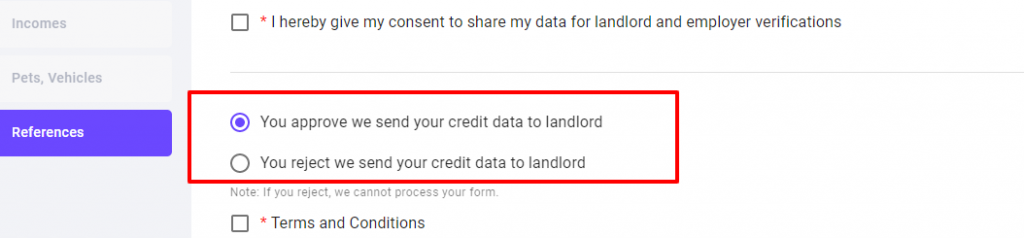
- Check the checkbox to agree to the terms and conditions and proceed towards the submit button.

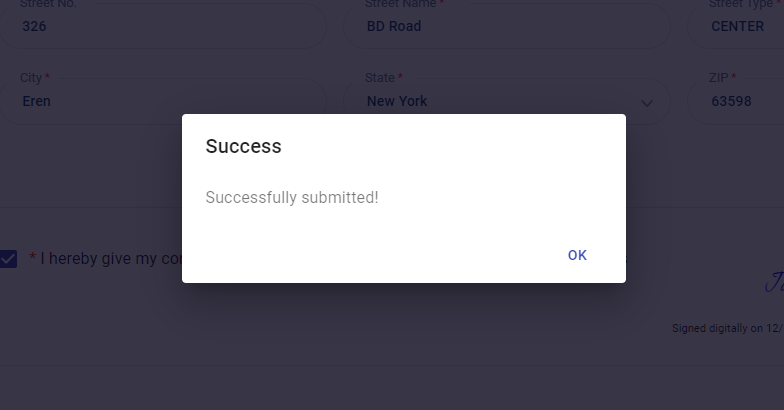
Upon submission, a pop up will show confirm submission.
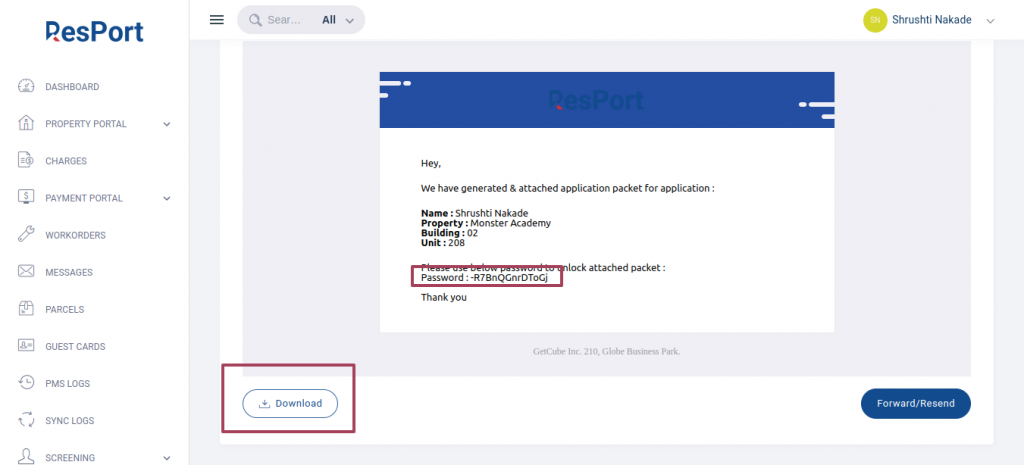
- Once the application is complete, the application packet will be created and will be emailed to the applicant.
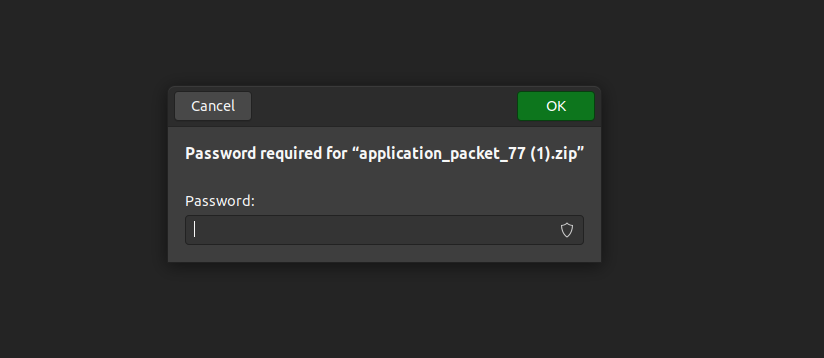
- Within the email, applicants will be able to download or view the application using a password found within the email.
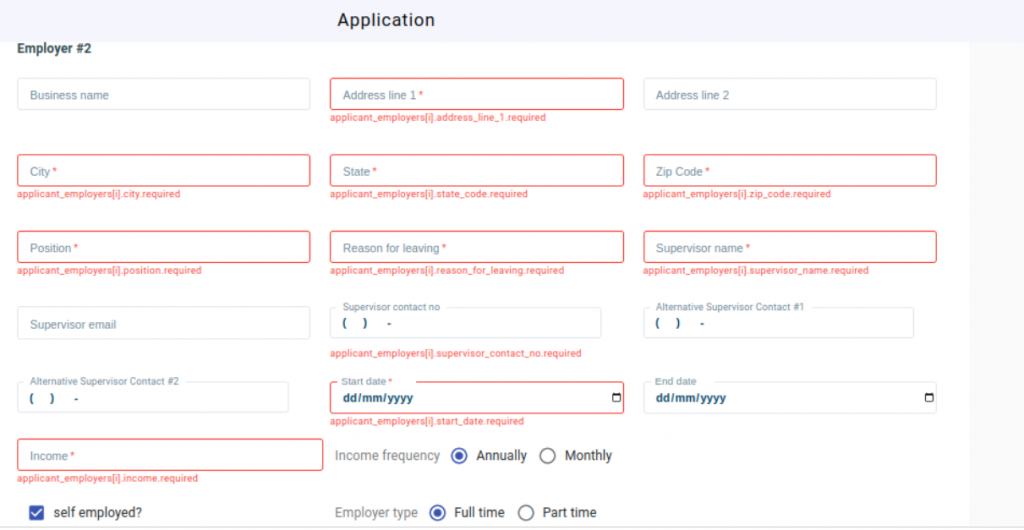
Note: If any mandatory field is left empty throughout the application, the form will not submit and will instead highlight needed fields in red as shown below. To correct, fill in necessary fields and resubmit.
Application Payment
- Once the application form is completed and the submission pop up is shown, click Ok to continue to the application payment
- Confirm the application amount and click Make Payment to continue.
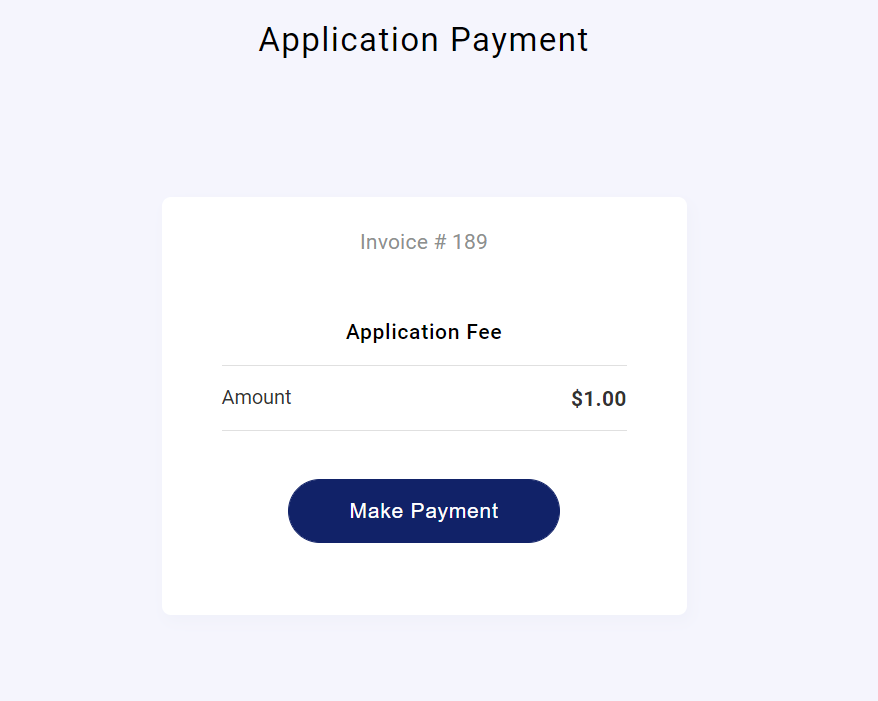
- Fill in the credit card information and click Submit to pay.
- Once payment has been processed, you will receive a confirmation invoice by email.

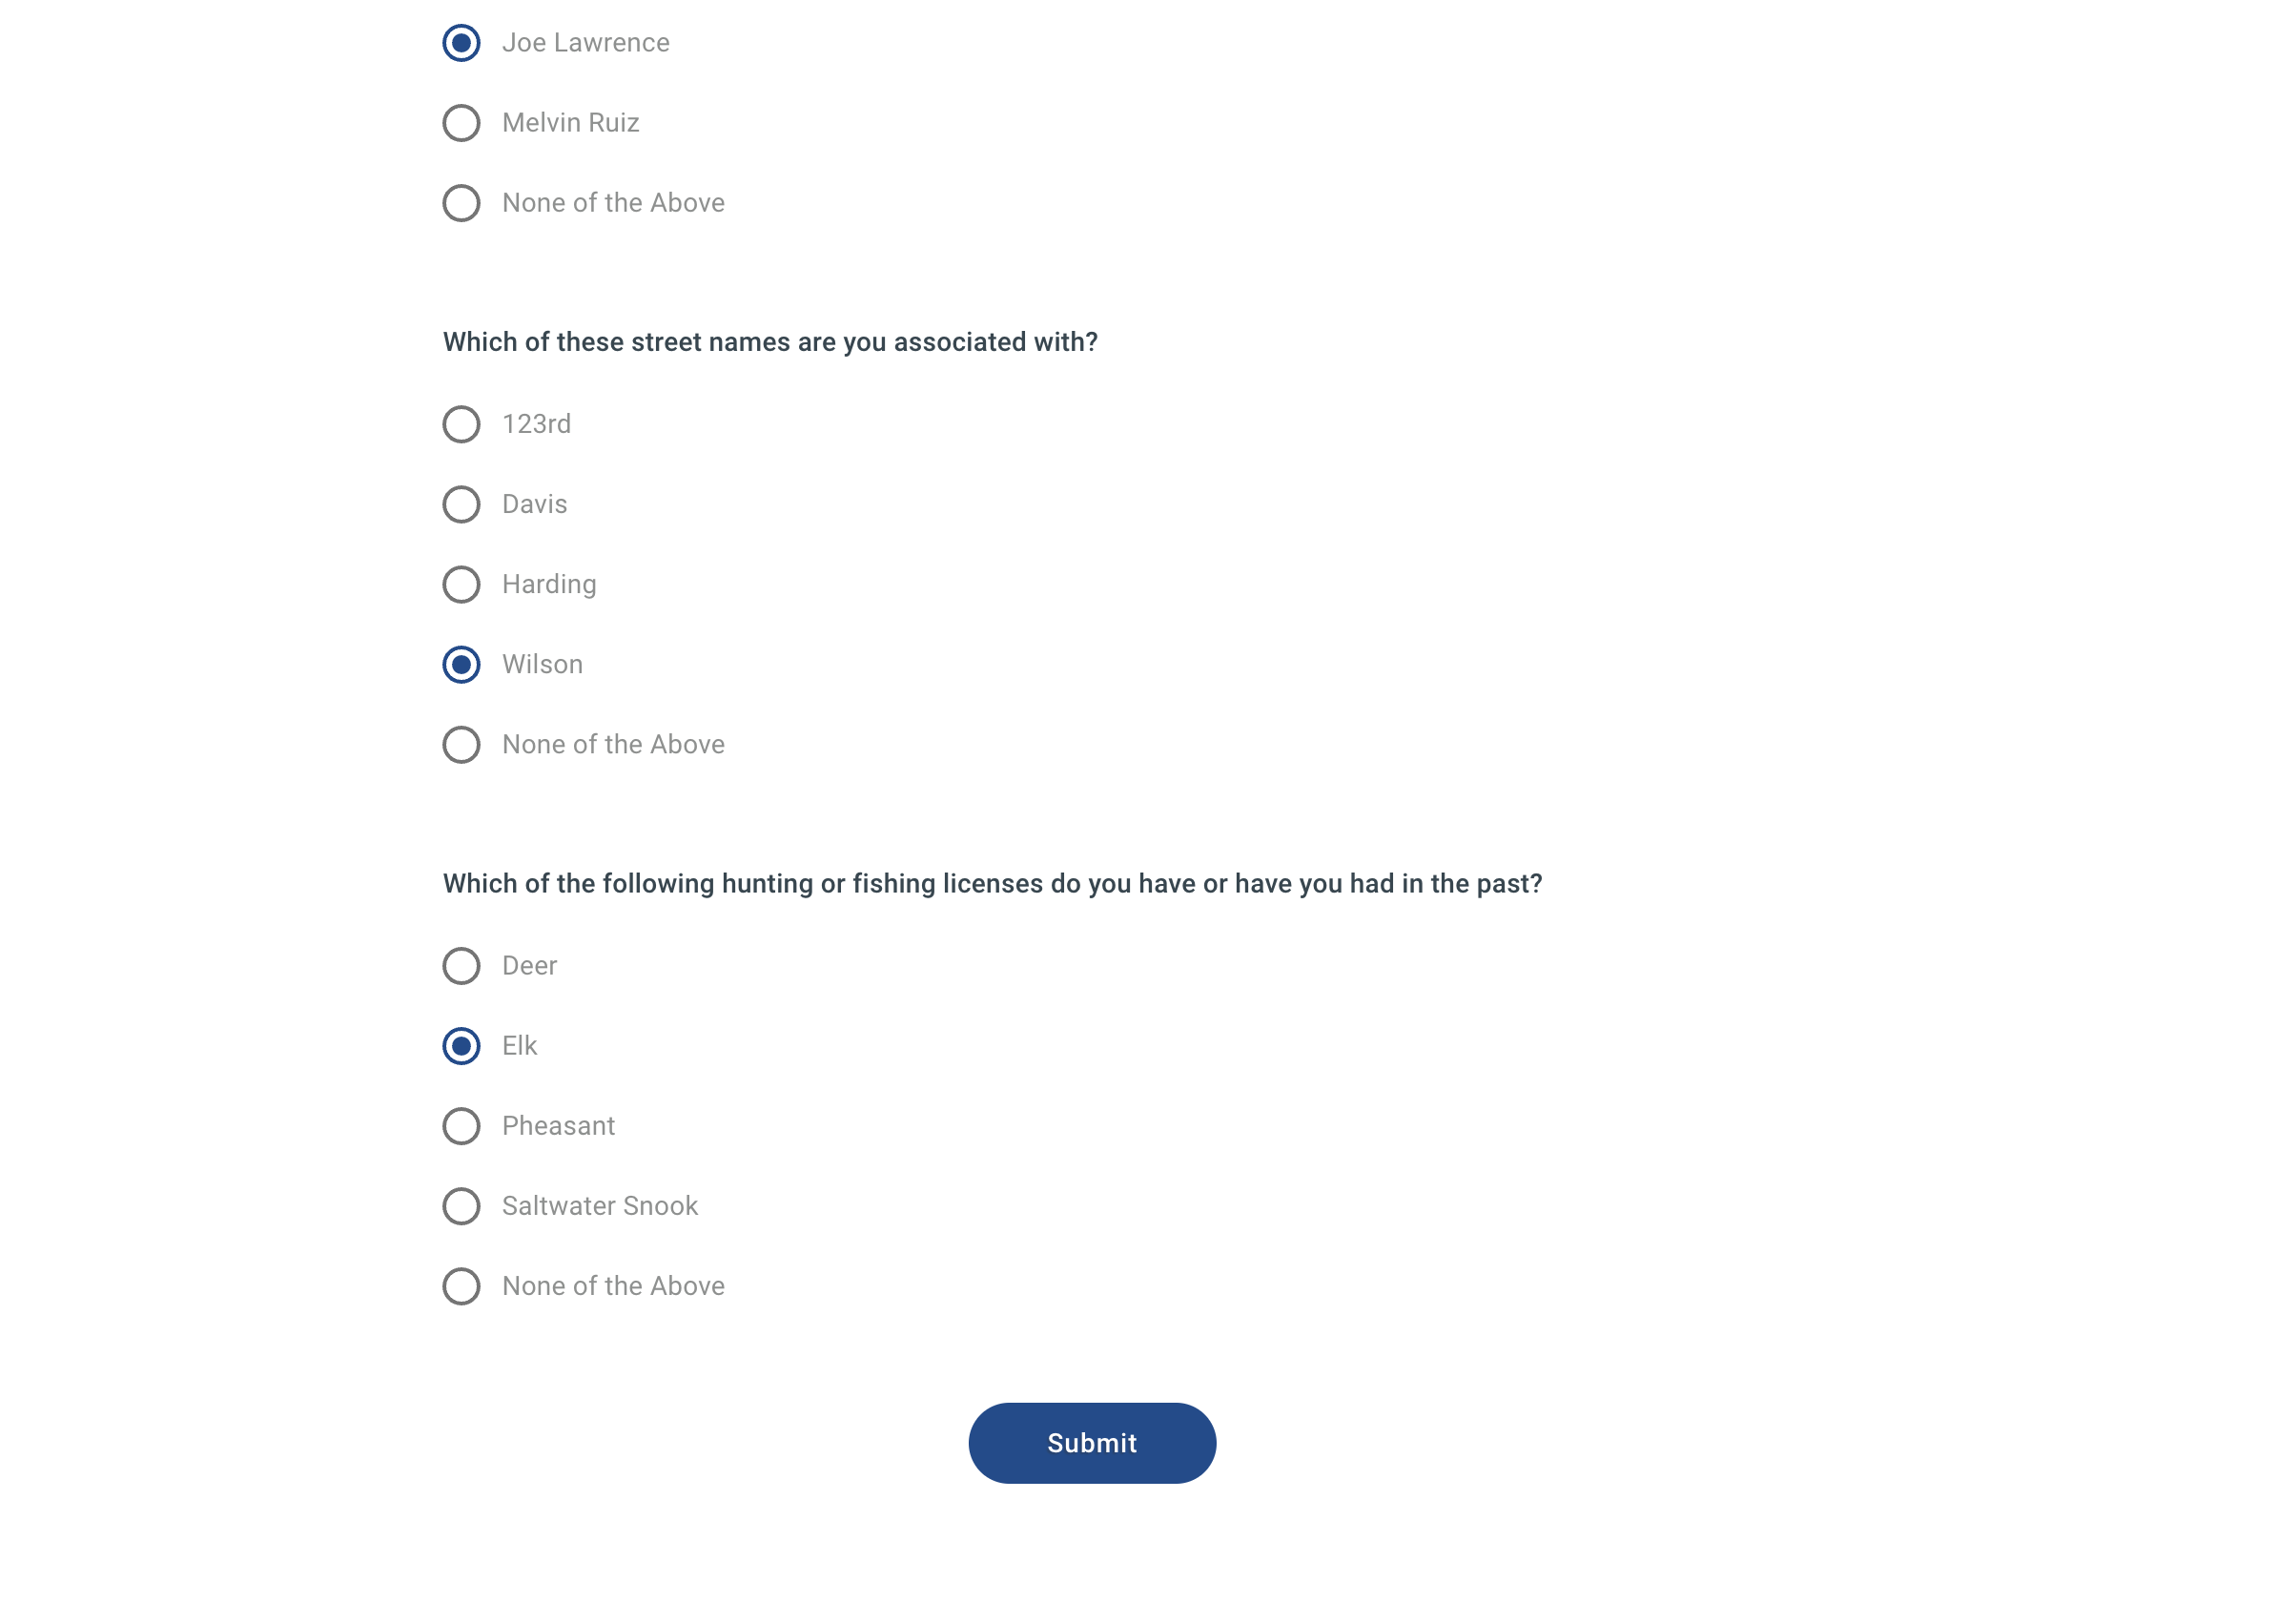
Screening Exam
- Mark the correct answers to confirm your identity.
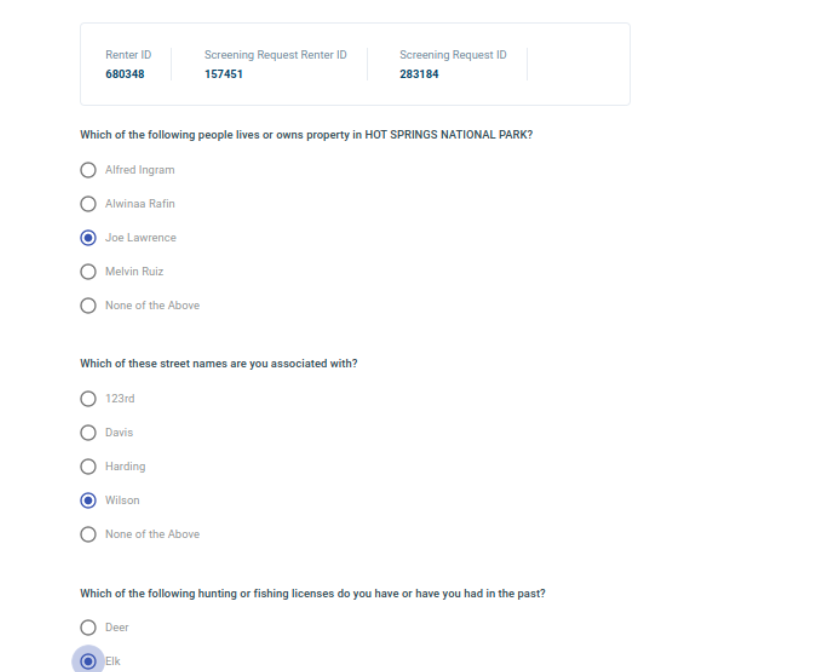
- Click submit, if your answers are correct you will pass the screening, and you will see the below page.
 Check you email for a final confirmation that your application for is complete.
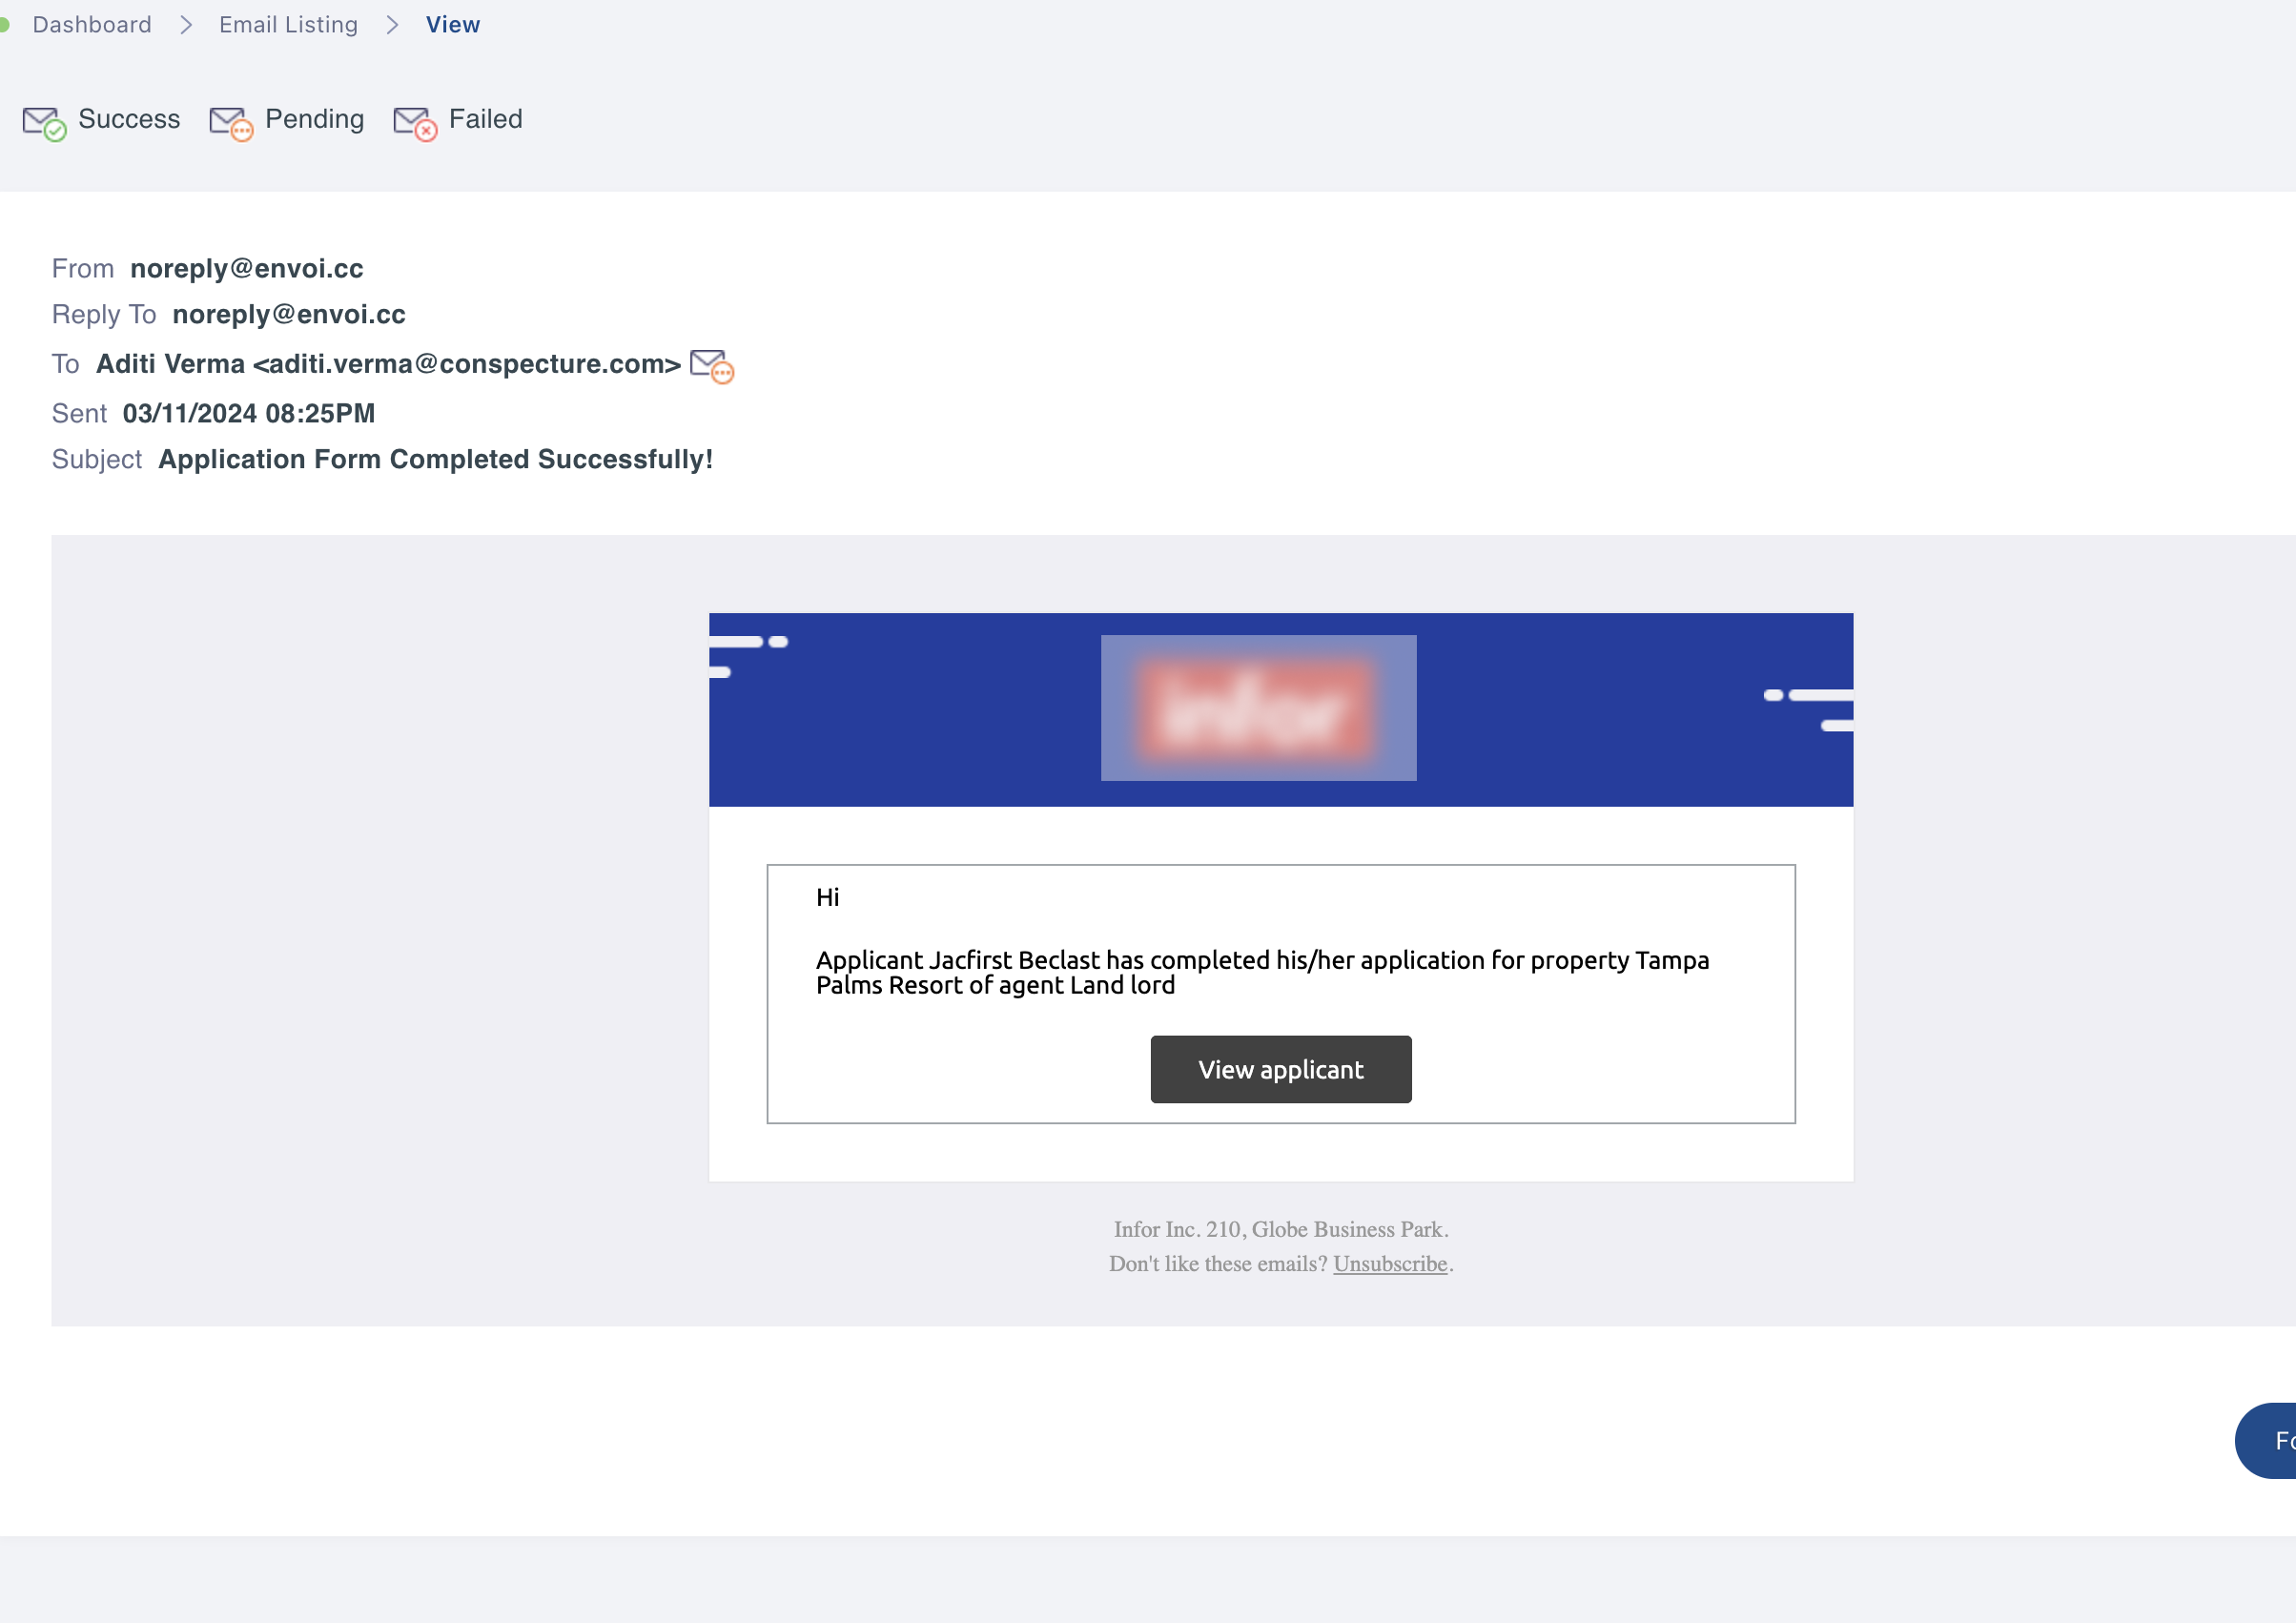
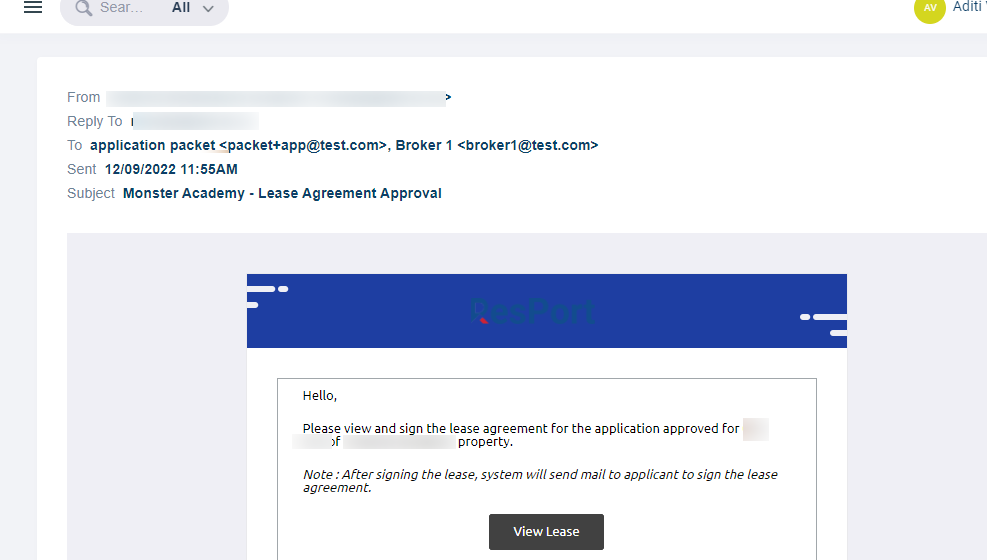
Broker Sign – (pms_screening_broker) policies required
- Once the applicant is approved, an email goes out to the broker for lease review and signature.
Lease Sign (pms_lease_manager) policies required
- After approval by the property, and/or broker, an email is sent to the applicant(s) to sign the lease.

- Click Sign Lease to review lease agreement and sign the corresponding applicant space.
- All applicants and Guarantors must sign their own section to move forward.
Applicant Login
- Within the email sent post application, applicants will receive a link and Property ID to login to the resident/tenant portal.
- Open up the resident/tenant portal and click on Login as Applicant to continue.

3. Put in the Property ID and email used during the application and click Submit.

4. Check email for an invitation link to sign in to your resident/tenant portal to view the application form.